All Products
All Products
All Products
-47%
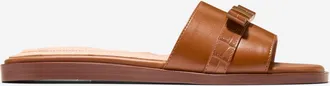
Cole Haan
Womens Go-To Emalia Slide Bow Sandals - Brown Size 10.5
$79.95
$150.00
Cole Haan

-30%
Nike
Womens Zoom Air Fire Shoes in Grey | DR7852-001 Gray
$87.97
$125.00
Nike

-18%
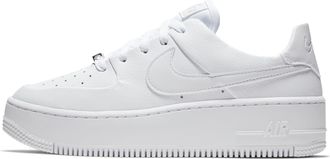
Nike
Womens Air Force 1 Sage Low Shoes in White | AR5339-100
$101.97
$125.00
Nike

Cole Haan
Womens GrandPrø Topspin Sneakers - White Size 10.5
$160.00
Cole Haan
Derek Lam
Buffy Utility Dress Black
$169.99
Rue La La

Autry
Medalist Low-Top Bicolor Leather Sneakers White
$195.00
Neiman Marcus

Eastland
Baldwin Leather Loafer Beige
$79.99
Rue La La

-38%
Nike
Womens Dunk Low Shoes in Black | HV4388-001 Red
$79.97
$130.00
Nike

Theory
Oversized Straight Linen-Blend Blazer White
$129.99
Rue La La
-28%
Nike
Womens Air Max Moto 2K Shoes in Brown | IQ0278-214
$96.97
$135.00
Nike
Ila
x Gaios Iva Bridal Cape White
$595.00
Anthropologie

Hutch
Amara Corset Pleated Tulle Fit & Flare Midi Dress Green
$348.00
Anthropologie
Moncler
Moncler Trailgrip Lite3 Sneakers, Men, Black, Size: 42,5
$770.00
Moncler

Nike
Mens Air Max Plus Shoes in Black | 604133-050
$190.00
Nike

Cole Haan
Womens GrandPrø Topspin Sneakers - White Size 10.5
$160.00
Cole Haan
-25%
Nike
Mens Air Max Torch 4 Shoes in White | CK0061-100
$74.97
$100.00
Nike

Cole Haan
Mens Judson Brushed Twill North/South Tote Bag - Beige
$348.00
Cole Haan

-39%
Nike
Womens Field General Shoes in Grey | HQ7397-001 Gray
$69.97
$115.00
Nike
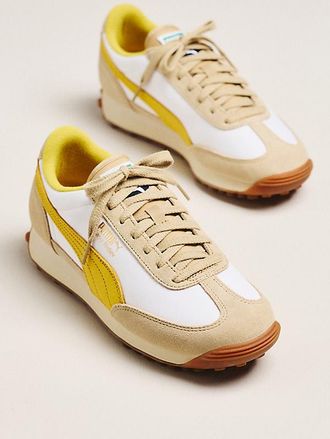
Puma
Easy Rider Vintage Sneakers Yellow
$95.00
Anthropologie

Nike
Mens Air Max Excee Shoes in White | FN7304-100
$100.00
Nike

Dolce & Gabbana
Lock Shoulder Bag In Calfskin - Woman Shoulder And Crossbody Bags Black Onesize
$1,345.00
Dolce & Gabbana
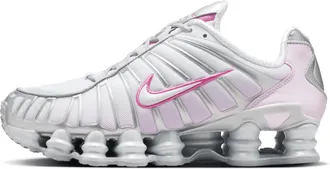
-39%
Nike
Womens Shox TL Shoes in Grey | HV2520-001 Gray
$114.97
$190.00
Nike
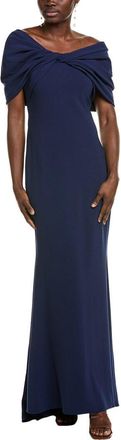
Badgley Mischka
Twist Drape Gown Blue
$228.99
Rue La La

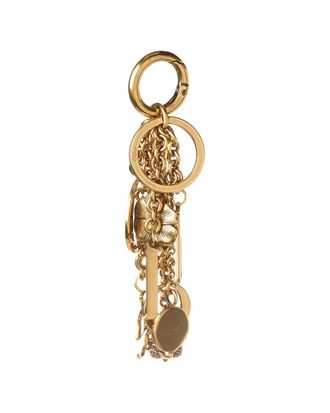
Chloé
Key Chain
$299.99
Rue La La

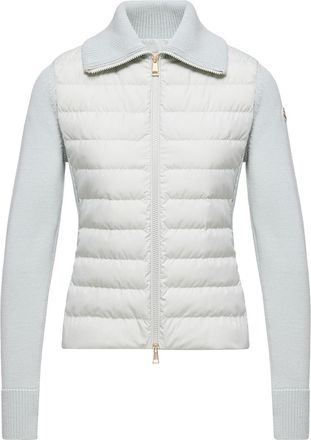
Moncler
Moncler Padded Wool Zip-up Cardigan, Women, Green, Size: Xs
$1,230.00
Moncler
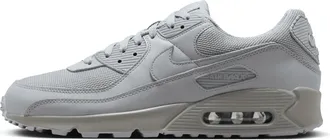
Nike
Mens Air Max 90 Shoes in Black | CN8490-003
$135.00
Nike

Moncler
Moncler Grimpeurs Hooded Windbreaker, Men, Black, Size: 0
$1,045.00
Moncler

Frye
Sacha Mid Stud Suede Boot Black
$87.00
Rue La La

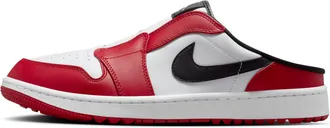
-33%
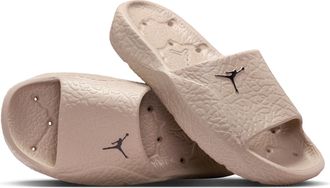
Nike Jordan
Womens Air Jordan 1 Low SE Shoes in White | IB8156-133
$86.97
$130.00
Nike

-15%
Cole Haan
Womens Pinch Long-Weekender Sandals - Beige Size 10.5
$109.95
$130.00
Cole Haan

Psycho Bunny
Mens Emerson Denim Pant 453 LIGHT WASH / 30 Gray
$148.00
Psycho Bunny

-47%
Cole Haan
Womens Oaklynn Double Band Footbed Sandals - Brown Size 10.5
$79.95
$150.00
Cole Haan

Psycho Bunny
Kids Desert Embroidered Sweatpant 313 SEA SPRAY / M/10-12
$70.00
Psycho Bunny
-30%
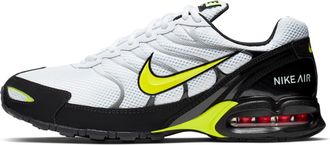
Nike
Womens Alphafly 3 Glam Road Racing Shoes in Orange | IO9559-800
$213.97
$305.00
Nike
Linea Paolo
Amber Canvas Sneaker Brown
$50.99
Rue La La
Moncler
Moncler Fleece Zip-up Sweatshirt, Women, White, Size: M
$845.00
Moncler
-35%
Cole Haan
Womens Grand Ambition Alette Buckle Loafers - Brown Size 10.5
$109.95
$168.00
Cole Haan

-50%
Santoni
Mens DBS Suede & Leather Low-Top Sneakers White
$360.00
$720.00
Neiman Marcus

-50%
Monica Vinader
Gold Solitaire Diamond Ring Lab Grown Diamond White
€120.00
€240.00
Monica Vinader
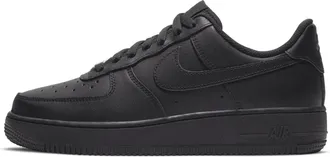
Nike
Womens Air Max 90 Shoes in White | DH8010-101
$135.00
Nike

Moncler
Moncler Knit Cotton Polo Shirt, Women, Blue, Size: Xl
$595.00
Moncler
Palm Angels
New Logo Pool Slide White
$129.99
Rue La La


Nike
Unisex Swim Fins in Black | NESS9171-919
$68.00
Nike

-39%
Nike
Mens Shox Ride 2 Shoes in Black | IM5999-010
$114.97
$190.00
Nike
Moncler
Moncler New Caradoc Tote Bag, Men, Blue, Size: One Size
$1,350.00
Moncler
-14%
Nike
Mens Offcourt Adjust Slides in Black | HQ2178-002
$35.97
$42.00
Nike

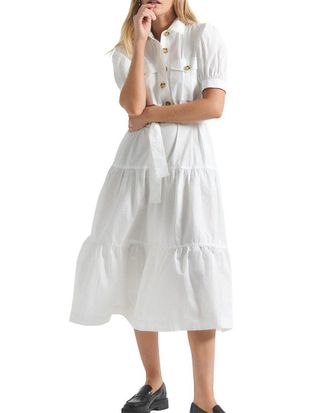
Maeve
Paz Buttondown Shirt by Maeve White
$118.00
Anthropologie
-20%
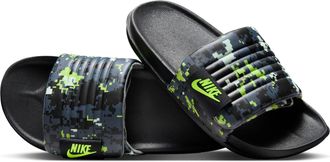
Nike Jordan
Mens Jordan Franchise Shower Slides in Brown | HQ2163-200 Pink
$27.97
$35.00
Nike
-50%
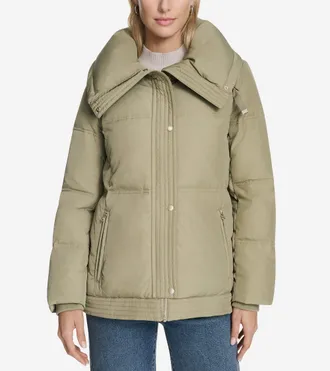
Cole Haan
Womens Twill Nylon Down Jacket with Trapunto Stitch Details - Green Size Medium
$124.97
$248.00
Cole Haan

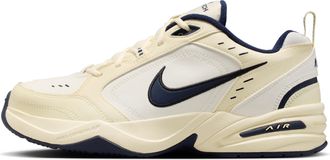
Nike
Mens Nike ACG Izy Shoes in Brown | FV4317-200
$135.00
Nike

Alemais
Sara Linen Twist Mini Dress Green
$590.00
Anthropologie
-18%
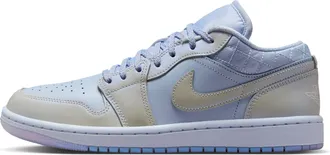
Nike Jordan
Womens Air Jordan 1 Low SE Shoes in Grey | IM5129-010 Gray
$105.97
$130.00
Nike

Moncler
Moncler Monogram Cotton T-shirt, Men, Blue, Size: 3xl
$420.00
Moncler
Candie's
Emiliana Platform Sandal in Black at Nordstrom, Size 6
$99.95
Nordstrom

Monica Vinader
Gold Havana Oval Charm Bracelet
€325.00
Monica Vinader
-21%
Nike
Mens Tawa Wrestling Shoes in Grey | CI2952-004 Gray
$118.97
$150.00
Nike
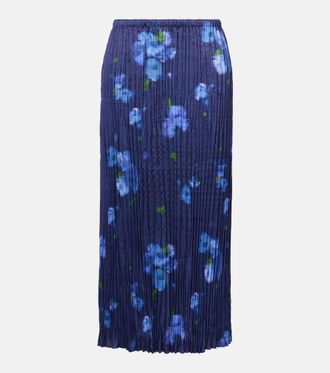
-30%
Vince
Poppy Blur plissé midi skirt Blue
$392.00
$560.00
Mytheresa
Marchesa
Cocktail Dress Purple
$299.99
Rue La La

-29%
Nike
Womens Calm SE Mules in Brown | FZ3119-100 Pink
$45.97
$65.00
Nike

Ferragamo
Moufflon Adjustable & Reversible Double-Gancini Buckle Leather Belt Black
$550.00
Bergdorf Goodman
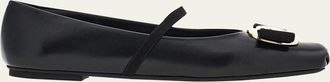
Ferragamo
Zina Leather Bow Mary Jane Ballerina Flats
$750.00
Bergdorf Goodman

-34%
Nike
Mens Air Max 1 86 OG G Golf Shoes in White | FN0697-100
$111.97
$170.00
Nike

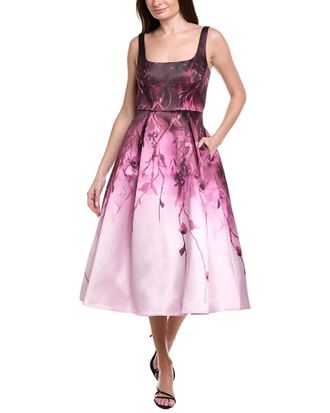
Shoshanna
Katalina Diamond Burnout Midi Dress Blue
$89.99
Rue La La

-17%
Nike Jordan
Mens Jordan Franchise Slides in Green | HF3263-300 Black
$28.97
$35.00
Nike

Luca Faloni
Light Blue Cashmere-Denim Jeans
$275.00
Luca Faloni

Nike
Womens TC 7900 Shoes in Grey | DD9682-100 Gray
$125.00
Nike
This season’s trends
- Dolce & Gabbana sandals
- Ecco sandals
- Gray Nike shorts
- Straw hats for men
- Prada sandals for women
- Swim trunks for women
- Moschino sandals
- Gucci shorts for men
- Gucci sandals
- Linen shirts for men
- Dr. Martens sandals
- Nike summer shoes for women
- Skechers summer shoes for women
- Clarks summer shoes for women
- HUGO BOSS sandals
- Cargo shorts for women
- Nike summer shoes for men
- Off-white sandals
- Skechers sandals
- Skechers sandals for women
- Lee shorts for women
- Amiri shorts
- Clarks sandals for women
about products and deals